Monday, July 20, 2009

Switching Undo Tablespace

CREATE UNDO TABLESPACE "UNDOTBS"

DATAFILE '/u05/abc/oradata/undotbs.dbf' SIZE 4000M;

SQL> select name from v$tablespace where name like 'UNDO%';
NAME

-------------------------

UNDOTBS1

UNDOTBS

ALTER SYSTEM SET undo_tablespace='UNDOTBS' SCOPE=BOTH;

SQL> show parameter undo

NAME TYPE VALUE

undo_management string AUTO

undo_retention integer 21600

undo_tablespace string UNDOTBS

SQL>select status from V$ROLLSTAT

STATUS

ONLINE

ONLINE

PENDING OFFLINE

PENDING OFFLINE

PENDING OFFLINE

PENDING OFFLINE

ONLINE

ONLINE

ONLINE

ONLINE

ONLINE

ONLINE

If the status is pending offline; u cannot drop undo tablespace UNDOTBS1

SQL>drop tablespace undotbs1 including contents and datafiles

If u drop u will get ORA-30013: undo tablespace 'UNDOTBS1' is currently in use

Note: You can find the following messages in alert.log after issuing alter system set command

Sat Jul 18 15:38:38 2009

Successfully onlined Undo Tablespace 7.

Undo Tablespace 1 moved to Pending Switch-Out state.

*** active transactions found in undo tablespace 1 during switch-out.

Sat Jul 18 15:46:28 2009

Undo Tablespace 1 successfully switched out.
Monday, July 13, 2009

Working on Datapump Export

Create a directory at O/S Level


$ mkdir dump_dir (for dump directory)

$ mkdir log_dir (for log directory)

$ chmod 775 dump_dir log_dir

Connect sqlplus and execute:

Sql> Create directory datapump_dir as ‘/u01/dump_dir’;

Sql> Create directory datapump_log as ‘/u01/log_dir’;

Sql> grant read,write on directory datapump_dir to public; # to take expdp for any schema

Sql> grant read,write on directory datapump_log to public;

$ more expdp.sh

#!/bin/ksh

export ORACLE_HOME="/u01/app/oracle/product/10.2.0"

export ORACLE_SID="abc"

echo export started at `date` >> /u05/abc/export/dailyexpdp_abc.log

$ORACLE_HOME/bin/expdp system/password dumpfile=datapump_dir:abc-expdp-`date '+%Y%m%d'`.dmp logfile=datapump_log:abc-expdp-`date '+%Y%m%d'`.log schemas=aet3

echo export stopped at `date` >> /u05/abc/export/dailyexpdp_abc.log

echo tape archiving started at `date` >> /u05/abc/export/dailyexpdp_abc.log

tar Ecvf /dev/rmt/0 /u05/abc/export

echo tape archiving stopped at `date` >> /u05/abc/export/dailyexpdp_abc.log

$ crontab -l

50 23 * * 0,1,2,3,4,5,6 /u06/abc/scripts/expdp.sh

It will generate dumpfile datewise.

Sunday, July 12, 2009

Enable Crontab

Giving Crontab permission to new os user

Login as root
Goto /etc/cron.d directory
Add the user entry (ex. ota ) in cron.allow file
Note: if cron.allow files doesn't exists then create it

Login as o/s user
Set the editor in .profile or .bash_profile
Example: EDITOR=vi;export EDITOR
Now you can schedule cron jobs.


To setup cronjob
crontab -l( list current jobs in cron)
crontab -e ( edit current jobs in cron)
_1_ _2_ _3_ _4_ _5_ executable_or_job
Where
1 – Minutes (0-59)
2 – Hours ( 0-24)
3 – day of month ( 1- 31 )
4 – Month ( 1-12)
5 – A day of week ( 0- 6 ) 0 -> sunday 1-> monday
e.g. 0 3 * * 6 Means run job at 3AM every saturday
This is useful for scheduling tablespace threshold, ftp, rman backup or removed old log files, or other scripts regularly.
Sample Scheduled backup:
$ crontab –l 
OTA Database:
50
23
*
*
0,2,3,6
/u01/ota/dailyexp_ota.sh
50
23
*
*
1,4
/u01/ota/offbkup_ota.sh
15
14
*
*
0,1,2,3,4,6
/u01/ota/morning_arch.sh


Upgrade Oracle from 10.2.0.1 To 10.2.0.4 on Linux x86 AS4 / Solaris

Upgrade Oracle from 10.2.0.1 To 10.2.0.4 on Linux x86 AS4
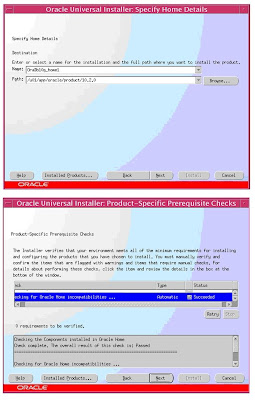
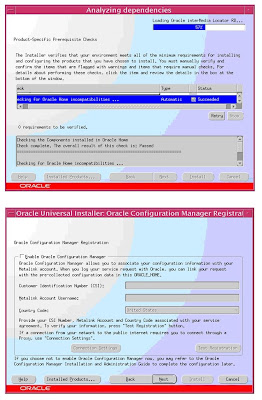
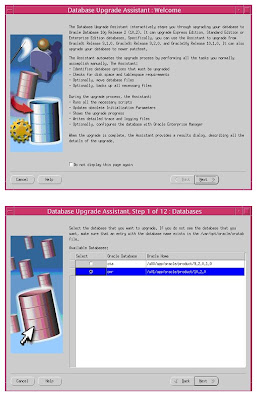
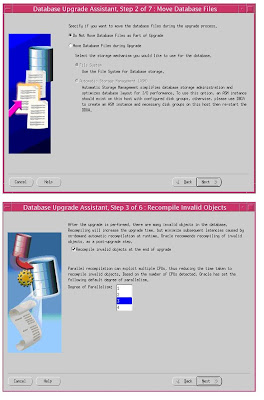
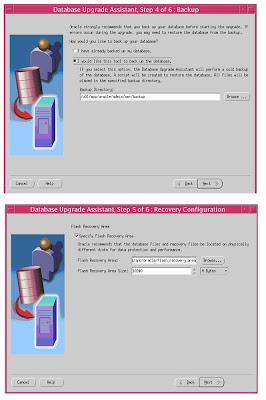
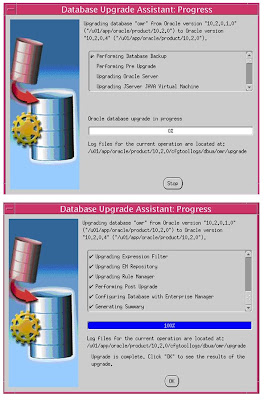
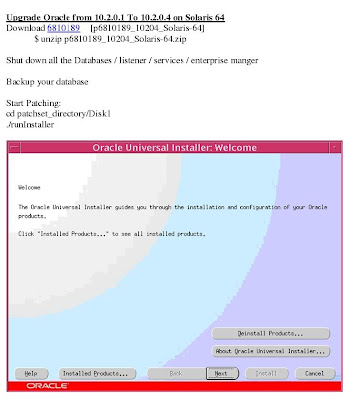
Screen shots below attached for production upgrade on solaris 64-BIT
Download 6810189 [p6810189_10204_Linux-x86]
$ unzip p6810189_10204_Linux-x86.zip
Shut down all the Databases / listener / services / enterprise manger
Backup your database
Start Patching:
cd patchset_directory/Disk1
./runInstaller
OUI starts and patch gets installed; When prompted, run the $ORACLE_HOME/root.sh script as the root user.
Upgrading a Release 10.2 Database using Oracle Database Upgrade Assistant
After you install the patch set, you must perform the following steps on every database:
If you do not run the Oracle Database Upgrade Assistant then the following errors are displayed:
ORA-01092: ORACLE instance terminated.
ORA-39700: database must be opened with UPGRADE option.
Start the listener as follows:
$ lsnrctl start
Run Oracle Database Upgrade Assistant
$ dbua
§ Complete the following steps displayed in the Oracle DBUA
§ On the Welcome screen, click Next.
§ On the Databases screen, select the name of the Oracle Database that you want to update, then click Next.
§ On the Recompile Invalid Objects screen, select the Recompile the invalid objects at the end of upgrade option, then click next.
§ If you have not taken the back up of the database earlier, on the Backup screen, select the I would like to take this tool to backup the database option
§ On the Summary screen, check the summary, and then click Finish.

Upgrade the Database Manually

After you install the patch set, you must perform the following steps on every database associated with the upgraded Oracle home:

Start Listener
Connect as sys user

Sql> Startup Upgrade

Sql> Spool Patch.Log

Sql> @ORACLE_BASE\ORACLE_HOME\rdbms\admin\catupgrd.sql

Sql> Spool Off

Review the patch.log file for errors and inspect the list of components that is displayed at the end of catupgrd.sql script.

This list provides the version and status of each SERVER component in the database.
If necessary, rerun the catupgrd.sql script after correcting any problems.

4. Restart the database:
Sql> Shutdown
Sql> Startup

5. Compile Invalid Objects

Run the utlrp.sql script to recompile all invalid PL/SQL packages now instead of when the packages are accessed for the first time. This step is optional but recommended.
SQL> @ORACLE_BASE\ORACLE_HOME\rdbms\admin\utlrp.sql

SQL> select * from v$version;

BANNER
----------------------------------------------------------------
Oracle Database 10g Release 10.2.0.4.0 - Production
PL/SQL Release 10.2.0.4.0 - Production
CORE 10.2.0.4.0 Production
TNS for 32-bit Windows: Version 10.2.0.4.0 - Production
NLSRTL Version 10.2.0.4.0 - Production

----Screenshots----


Enable X Manager

Install X manager enterprise edition on any client machine;
login on server as root and
run gdmsetup utility
and enable XDMCP


Now you can login remotely using X browser

Delete archive log without catalog

Connect rman

$ rman target sys/password@connect_string

RMAN > crosscheck backup;

RMAN > delete archivelog until time `SYSDATE – 7`;

OR

RMAN>delete archivelog until sequence=(sequence_number);